
diy acrylic coasters
- Mar 3, 2019
- 2 min read
Updated: Sep 28, 2020
I always thought it would be so fun to have Instax polaroid coasters, but all other options were permanent and I didn't want to specifically dedicate certain pictures for coasters and lose the chance to display them elsewhere. The solution was creating these coasters where pictures (or notes or confetti) were interchangeable. I'm so in love with them 🥰
DIY ACRYLIC COASTERS:
Time: 1 hour
Cost: $
Makes: 3 Coasters
Materials:
10x8 Acrylic Picture Frame, like this*
Electric Saw or Box Cutter
Ruler, Painter's Tape, and Pen
Sanding Block
Pictures, notes, etc.
Instructions:
1.) Clean your acrylic frame so that it is free from dust and dirt. I got mine from Dollar Tree, so it needed a quick wipe down.
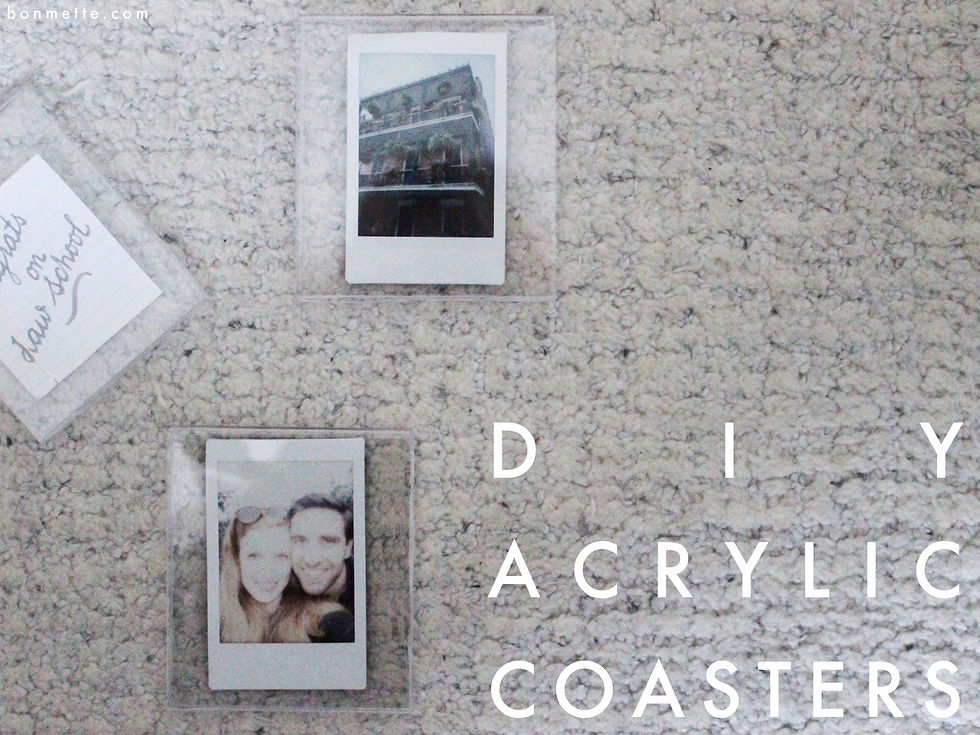
2.) Using your painter's tape, ruler, and pen, mark out the dimensions that you want for your coasters. I used 3.5 x 3.75 inches for a larger coasters (basically for coffee mugs), and 3.25 x 3.75 inches for the others, since it seemed to fit the polaroid shape a little bit more.
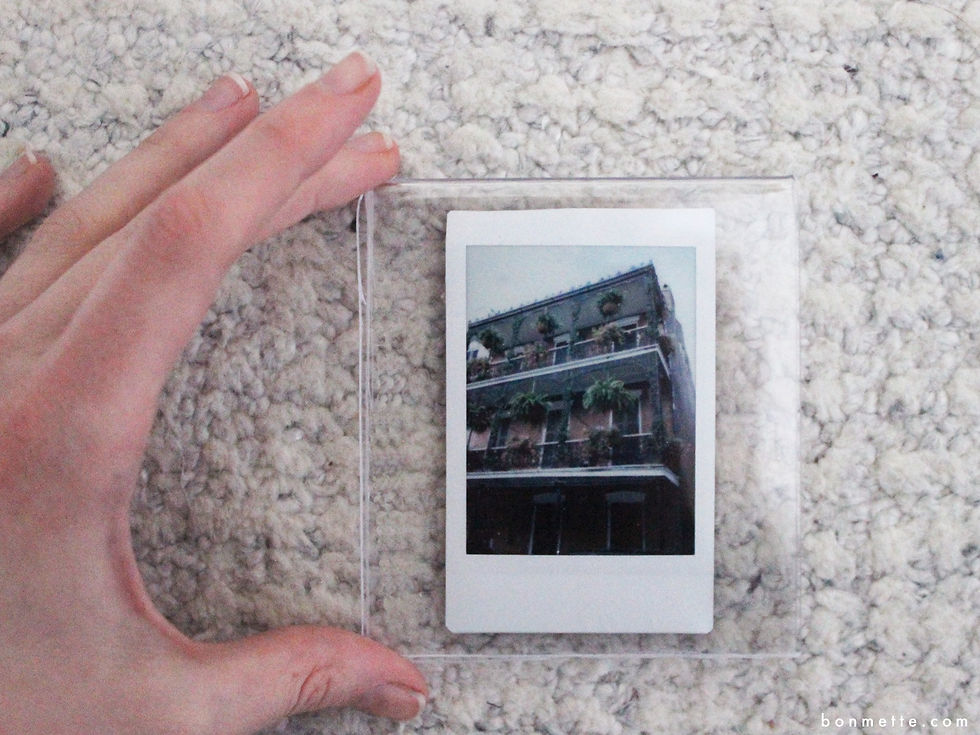
3.) You want to be measuring and cutting where there is that sort of double acrylic portion at the bottom of the frame. That's how you will be able to slide in and out your pictures/notes.
3.) Once you have measured out the dimensions, it's time to use the good old electric saw and make the cuts. If you don't have one, like me, you will have to do it the old fashioned way with a box cutter. To do this, you basically make a lot of cuts over and over and over again. There is a video (not mine) on how to do that here.
4.) After cutting your 3 coasters, lightly sand any rough edges and dust off any acrylic scraps.
5.) Put fun pictures or photos or notes inside and enjoy!
*When choosing a frame, make sure the acrylic "doubled over" portion in the back is at least 2.5 inches.
**Obviously you can use different sized frames--the 10x8 is simply my recommendation.
Comments